Follow these steps to start using the Tag Groups plugin for the first time. After installing the plugin, this guide will get you started with Tag Groups.
Step #1. Select the Taxonomies #
The plugin creates a new menu called Tag Groups. First you should go to the Taxonomies sub-menu.

Select the taxonomy that you want to organize in groups. The default is Tags (post_tag), which is the default taxonomy that people mean when they talk about “WordPress tags”.
- Don’t select more taxonomies than you actually want to use with that plugin.
- Don’t select more than one taxonomy from each post type. You can see the post type when hovering your mouse over a taxonomy.
- Avoid using hierarchical taxonomies, such as categories. Hierarchical taxonomies are not officially supported, but you can experiment with them if you like.
After you have saved your changes, a new submenu Tag Groups Admin will appear under the menu of that chosen post type. For Tag (post_tag), you find the Tag Groups Admin menu under Posts.
Step #2. Create and Edit Tag Groups #
The next step is to create groups. Before you have any tag groups, you cannot assign your tags to them.
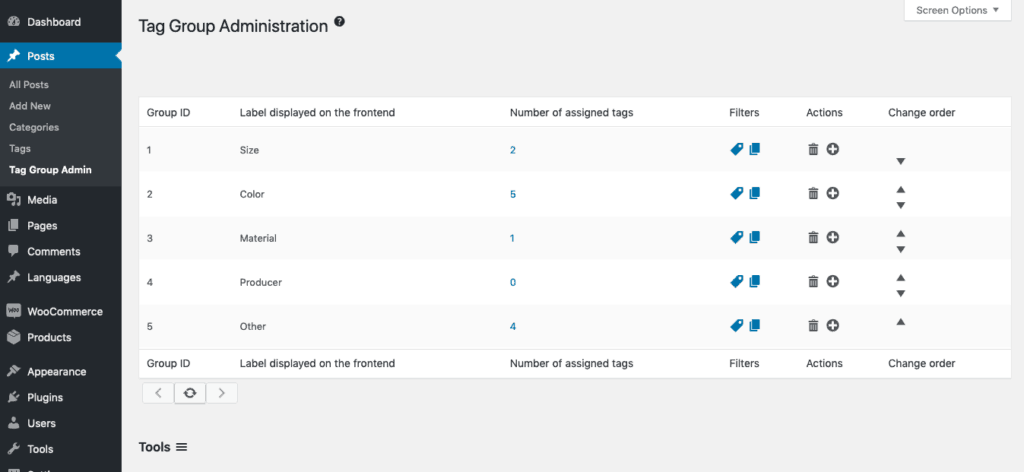
- Create a new group below a row by clicking on the plus icon.
- Click on the trash icon to delete a group.
- Click on an arrow to move a group up or down. The order is relevant for displaying groups in tag clouds.
- Drag and drop a group to a new position.
- Click into a name to edit it.
- Click on the number of tags to go to the list of tags, filtered by the selected group.
- Click on the paper sheets icon to go to the list of posts, filtered by the selected group.
You can always come back later and add, rename and reorder the groups.
Deleting a group will not delete any tags, but mark them as “unassigned”.
Step #3. Assign Tags #
Next, go to the tags (or your chosen taxonomy) and assign them to groups. By default, each tag is unassigned (group ID 0). In the free version each tag can be assigned only to one group.

There are several ways how to assign tags to groups or unassign them.
- When you create a new tag, select the group in the drop-down menu.
- Click on an existing tag and on the edit screen select the group in the drop-down menu.
- Click on “Quick Edit” under the tag in the list and select the group in the drop-down menu.
- Change multiple tags in one go with the “Bulk Actions” menu.