How to Add Categories to WordPress Pages
WordPress Categories and Tags are the two main ways to organize your WordPress content.
Both Categories and Tags are “taxonomies” and they can help you sort your content. However, on a normal WordPress site, both Categories and Tags are only available for Posts. This means that you do not have any options to organize your Pages, unless you use a plugin such as TaxoPress.
In this tutorial, I’ll show you how to add Categories to your WordPress Pages. First, we’ll have a video guide and then a text guide.
Table of Contents
Video Guide to Adding Categories to Pages
Text Guide to Adding Categories to Pages
- Install the TaxoPress plugin.
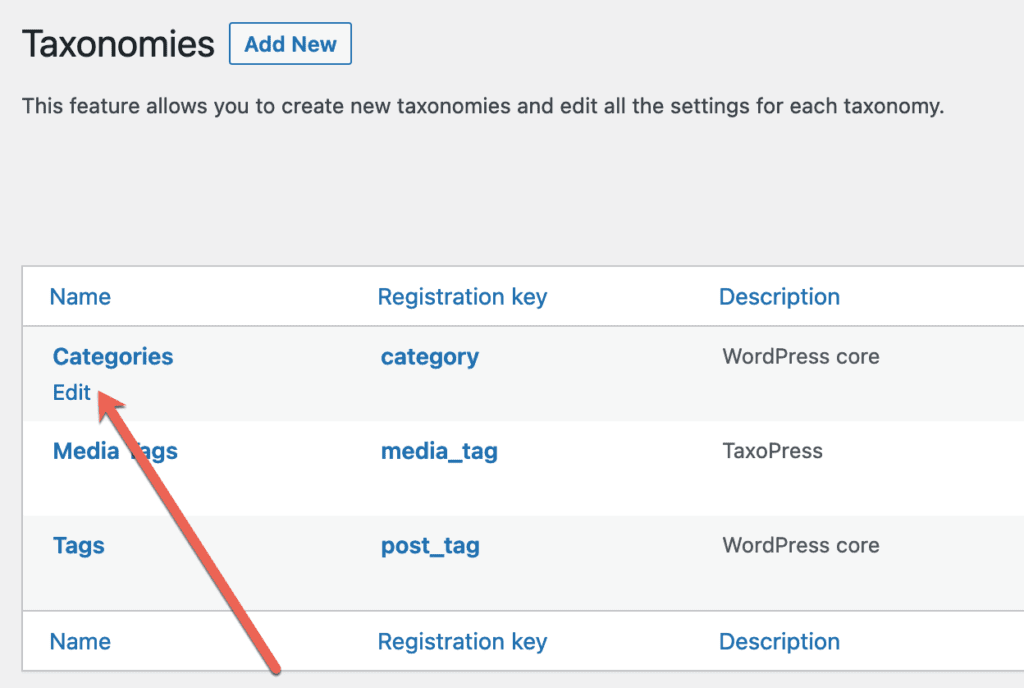
- Go to “TaxoPress” and then “Taxonomies” in your WordPress admin area.
- Click “Edit” under “Categories”.
- Click the “Post Types” tab.
- Check the box for “Pages”.
- You may also way want to check the box “Show content from all post types on archive page” so that your Posts and Pages are grouped together on the Category pages.
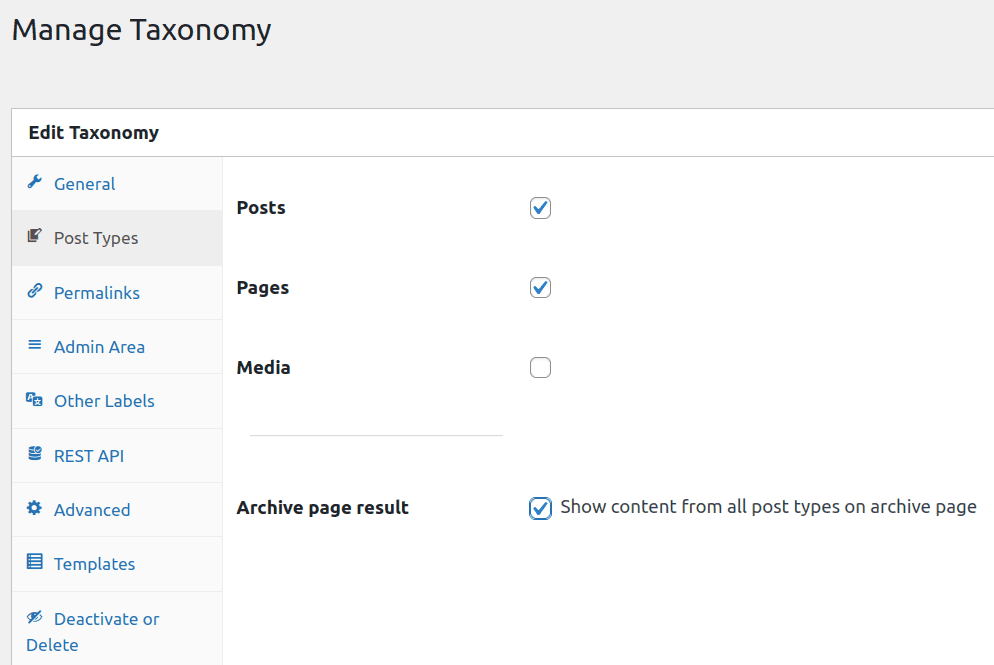
- Click “Save Taxonomy”.
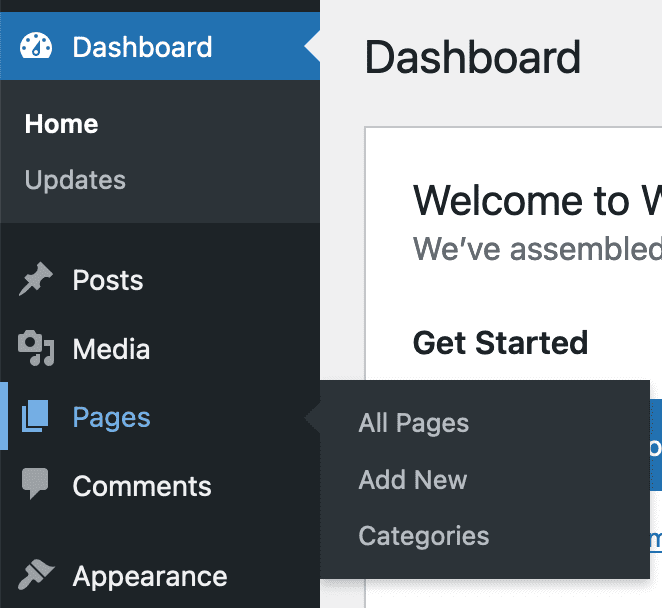
- Refresh your WordPress Dashboard screen.
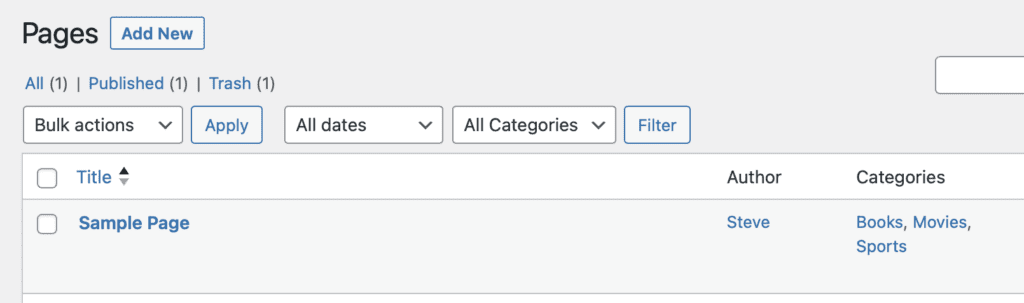
- You will now see that “Categories” are available under “Pages” in your WordPress admin menu:
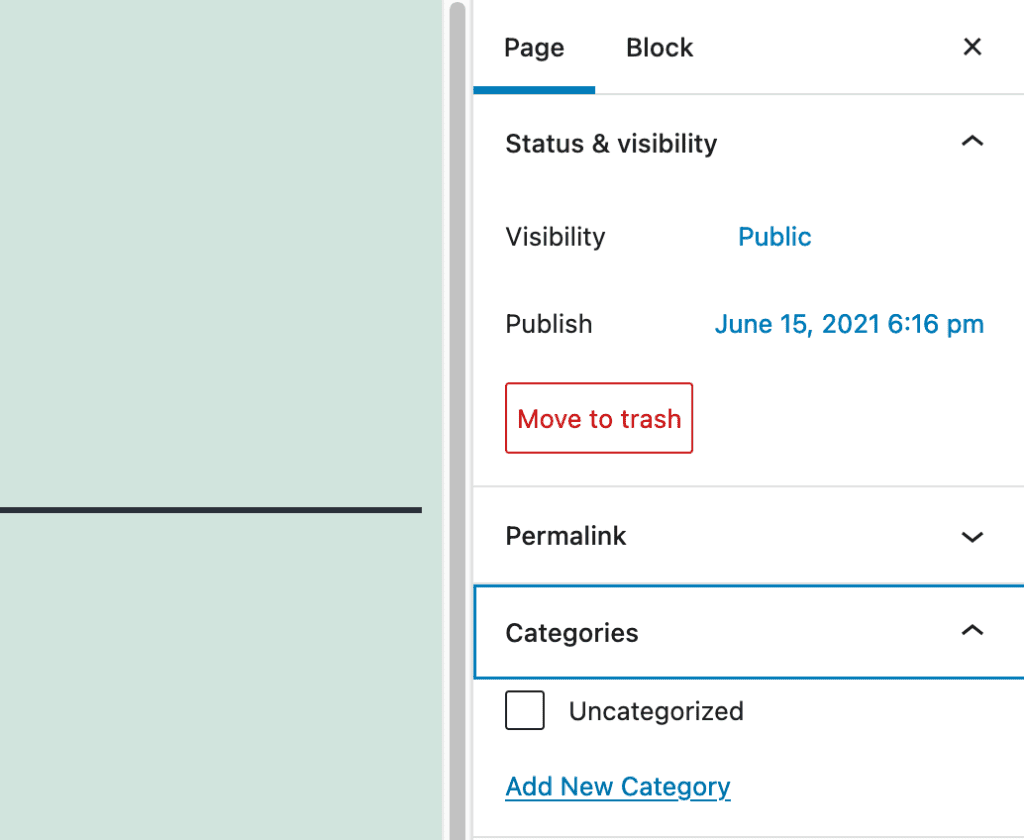
- When you are editing a Page, you will see the “Categories” box in the right sidebar.
- You will also be able to add and remove Categories using the “Quick Edit” and “Bulk Edit” features.

Please note that your Categories are now available for Pages in your WordPress admin area. However, the Categories will not automatically display on the frontend of your site. You will also need to change how Categories are displayed on your site.
How to Display Categories on Pages
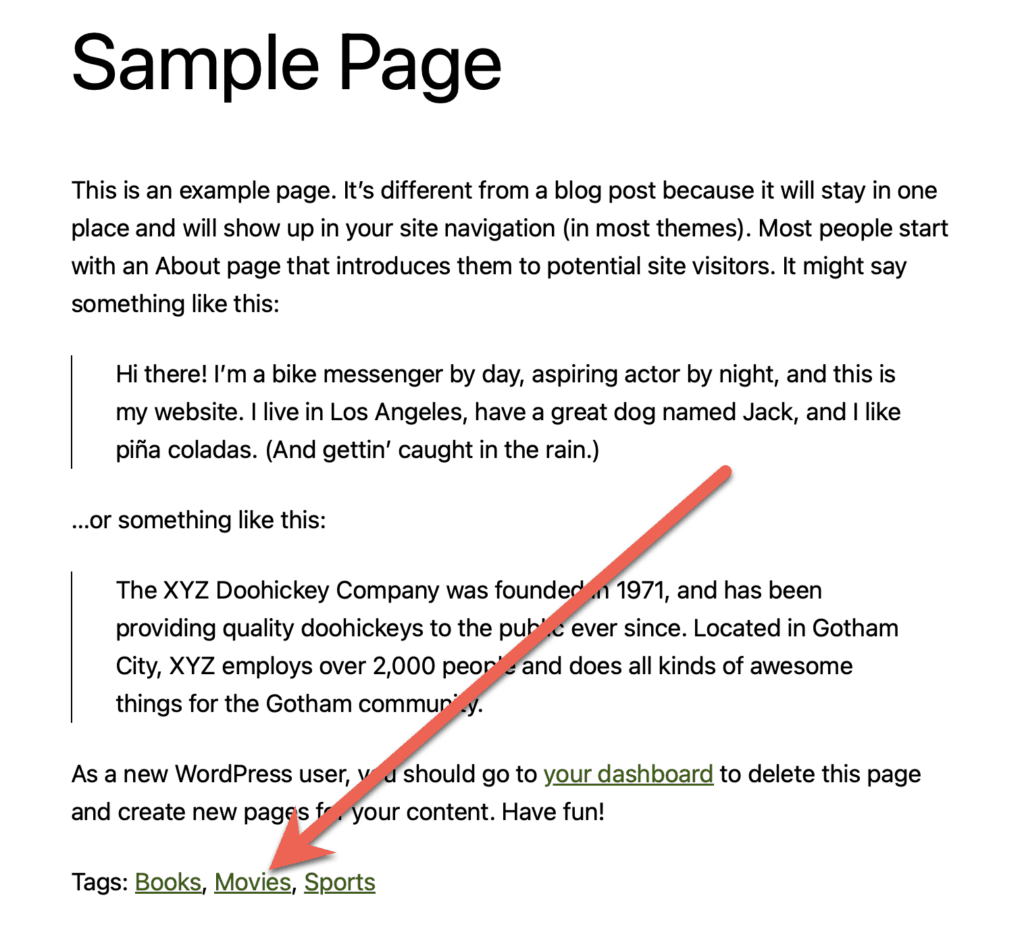
By default, WordPress will probably not show Categories even if they are attached to Pages. The TaxoPress plugin does offer some ways to fix this. In this example below, I’ve added “Books”, “Movies”, and “Sports” as Categories.
One option is to use the “Terms for Current Post” option in TaxoPress.
- Go to “TaxoPress” and then “Terms for Current Post.”
- Go to the “Display” tab.
- Check the box for “Pages”.

Once you’ve done this, TaxoPress will attempt to automatically display terms in this content. It may not be successful for all post types and layouts. This screenshot below shows the result when using the default Twenty Twenty Three theme.
Summary of Adding Categories to Pages
If you want more options, check out this guide to displaying Categories on your site.
Once you’ve added Categories to Pages, you can use all kinds of useful TaxoPress features. For example, you can use the “Auto Terms” feature to automatically assign Categories. You can also choose the default Category for when you create new pages. You can also check out the PublishPress plugins that can help with tasks such as restricting users to posting on one category.