How to Choose Default Taxonomy Terms in WordPress
When you install a new WordPress site, there are two taxonomies (Categories and Tags) and one term (Uncategorized).
Every WordPress post must have at least one category. By default, this required category is “Uncategorized“, but that name isn’t useful or relevant for most sites.
So in this guide, we’ll show you how to replace “Uncategorized”. We explain how to choose one or more default terms to organize your WordPress content.
Table of Contents
What are The Default Tags and Categories?
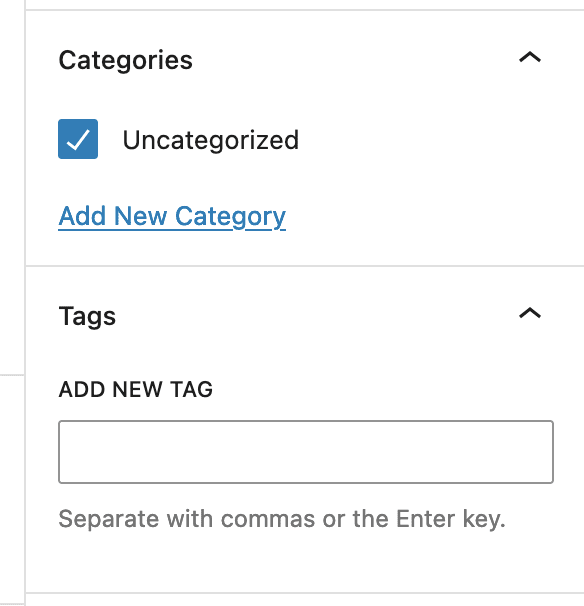
When you install a new WordPress site, there will be no tags on your site. The “Tags” screen is completely empty and there’s only the message “No tags found”. This means there is no default tag, but later in this guide we’ll show you how to add one.

On your new site, there will be only one category. The “Categories” screen will contain only the “Uncategorized” option. Underneath the main area is a message which says “The default category cannot be deleted.” There will not be a “Delete” option for this category. You can change the name, but there must always be at least one category.

When you add a new post, the “Uncategorized” box is checked automatically when you try to save the post. If you uncheck the “Uncategorized” box, it will just be re-checked again by WordPress.
How to Change the Default Category
There are several ways that you can change the default category on your WordPress site.
One approach is simply to change the name from “Uncategorized” to something else. In this image below, I’ve changed the name to “News”.

It’s also possible to replace “Uncategorized” with an alternative category.
- Go to Settings > Writing in your WordPress admin menu.
- You can change the “Default Post Category” option.

How to set your own default terms
There are several limitations with the WordPress approach to default terms. For example, you can not add a default term for tags or other taxonomies. Also, you can not add more than one default term.
If you want to choose your own default terms for tags, categories, or other taxonomies, your best option is the TaxoPress plugin. In this section of the tutorial, we’ll show how to use TaxoPress to add default tags.
- In this image below, we’ve added multiple tags. This is a food blog and the tags will be used to categorize our recipes.

- After installing TaxoPress, go to the “Taxonomies” menu link.
- Click “Tags”.
- On the “General” tab, you can enter one or more default terms. You can either enter the names of the terms, or their slugs.

- Go to create a new post. The terms you have chosen in TaxoPress will be automatically filled into the “Add New Tag” box.

Choose default WooCommerce Product Categories and Tags
WooCommerce works in a very similar way to the WordPress core. WooCommerce has “Product Categories” and “Product Tags”. There is one “Uncategorized” product category that is the default for all new products.

- Go to the “Taxonomies” menu link.
- Click “Product categories”.
- On the “General” tab, you can enter one or more default terms. In the example screenshot below, I’ve chosen “Discounted”, “New” and “Homemade”.

In this final screenshot, you can see a new product screen with multiple terms selected by default:

Add a Default Term to All Your Existing Posts
If you decide to add a default term to an existing site, this is possible with the TaxoPress plugin.
- Go to “TaxoPress”, then “Manage Terms.
- Choose the “Add terms” tab.
- Enter the terms you want to add to all current posts.
- Click “Add”.
